
Interior Painting Process
Every room type is different. Here is how we handle each one.
Every Room
Requires Different Prep
The living room, kitchen, and bathroom each present unique prep challenges. Here is exactly what we do differently in each space — and why it matters for the final result.
Living Rooms & Bedrooms
Prep Checklist
- All furniture moved to center or covered with plastic
- Picture hooks filled and sanded
- Wallpaper seams addressed if visible
- Baseboards masked with precision tape
Pro Tip
A bedroom ceiling paint job looks completely different from a quick wall refresh. We always cut ceiling lines first before rolling walls.
Kitchens
Prep Checklist
- All appliances fully covered with plastic
- Grease-cutting primer on walls behind stove
- Cabinet interiors masked if not in scope
- Exhaust fan covered to prevent dust intake
Pro Tip
Kitchen walls carry cooking grease that prevents paint adhesion. We clean with TSP (trisodium phosphate) before priming — a step most painters skip.
Bathrooms
Prep Checklist
- Mold-resistant primer applied to all surfaces
- Existing mildew treated with bleach solution
- Caulk around tub and fixtures removed and replaced
- Exhaust ventilation confirmed to be functional
Pro Tip
Bathroom paint requires mold and mildew resistant paint. Sherwin Williams Duration or Bath paint is our standard. Standard paint will fail within 6–12 months in a humid bathroom.
Hallways & Stairwells
Prep Checklist
- High-traffic walls sanded for better adhesion
- Scuff marks and handprints cleaned before painting
- Railings masked carefully to protect stained wood
- Extra prep time for difficult ceiling angles
Pro Tip
Hallways and stairwells are high-traffic — the paint takes more physical contact. We always recommend a satin or semi-gloss finish in these areas for washability.
Same Color Refresh vs Color Change
These are two very different projects. Here is what changes — and what it means for your timeline and cost.
Same Color Refresh
Dramatic Color Change
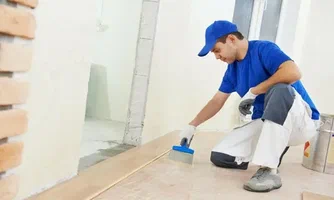
How We Actually
Apply the Paint
Professional application is not just about the right paint — it is about technique. Here is what our painters do that most DIYers and low-budget contractors skip.
Cut Lines First
Every edge — ceiling line, trim, corners — is cut with a brush before any rolling begins. Tape alone is not enough for a professional line.
Roll Top to Bottom
We always roll walls from the ceiling line downward in a W pattern to avoid lap marks. Overlapping wet into wet is critical.
Respect Dry Time
We never apply the second coat before the first is fully dry. Rushing this causes bubbling, adhesion failure, and uneven sheen.
Inspect in Raking Light
Before leaving, every wall is inspected with a raking light (flashlight at a low angle) to catch any skips, drips, or thin spots.